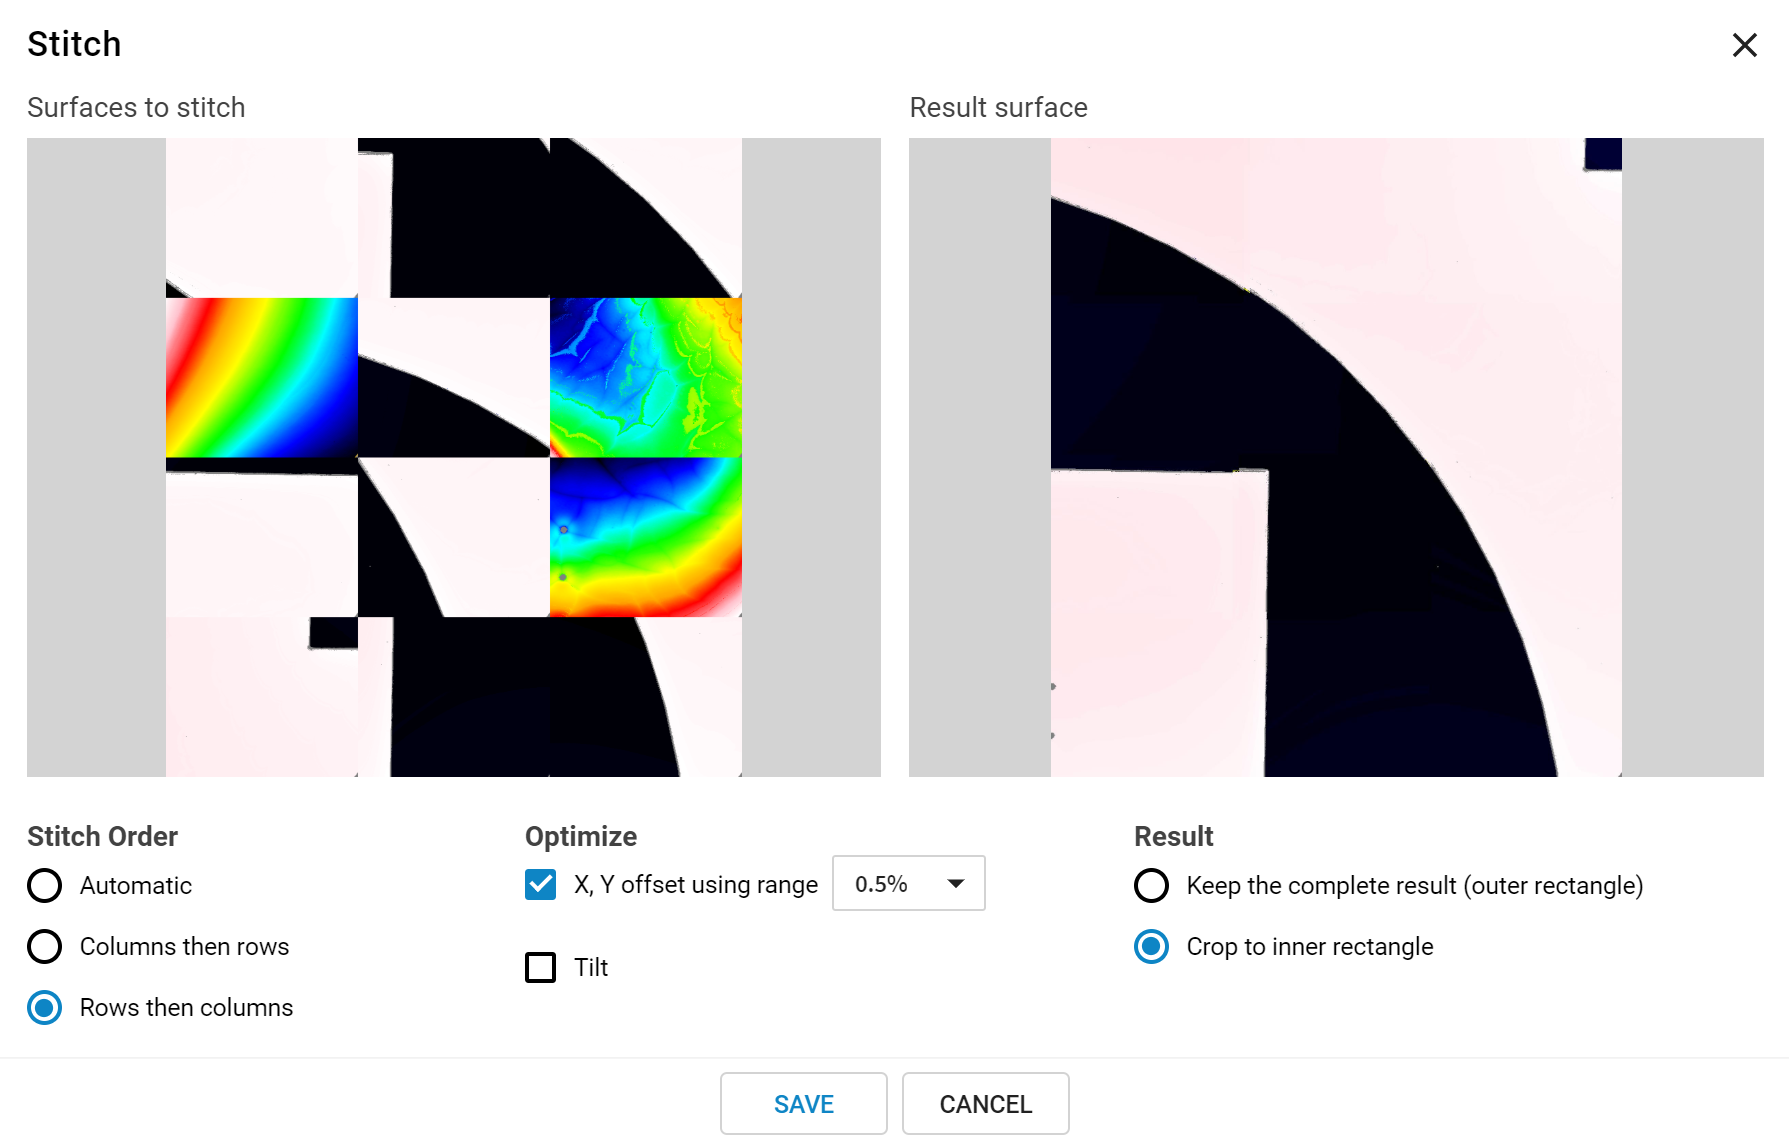
Stitching joins multiple images into a single image; used when a sample or feature is larger than the image scan area. Images must have areas of overlap in order to be stitched. Use the below instructions to generate a stitched image from My Images.
An example of a stitched scan
1. Select individual images, or all images using Select All from My Images.
2. Stitch Order - Depending on the nature of the surface, changing the stitch order can result in a better overall fit. Select Automatic to have ProfilmOnline decide stitch order, or select to stitch by rows or columns first. Click Update... to see the resulting stitched image.
3. Optimize – Select X,Y offset using range to have ProfilmOnline hunt for the best overlap using the se-lected range value, or leave unselected to use the standard routine. Uncorrected tilt can also be optimized by ProfilmOnline. Click Update... to see the resulting stitched image.
4. Result – Select to keep the complete result (shown in Result surface), or crop to the inner rectangle. Crop to inner rectangle will try to find the largest contiguous measured area in the stitched data, while excluding the unmeasured sections that may result from the stitching process.
5: Click Save to complete the stitching process and save the resulting image, or Cancel to exit without saving changes.
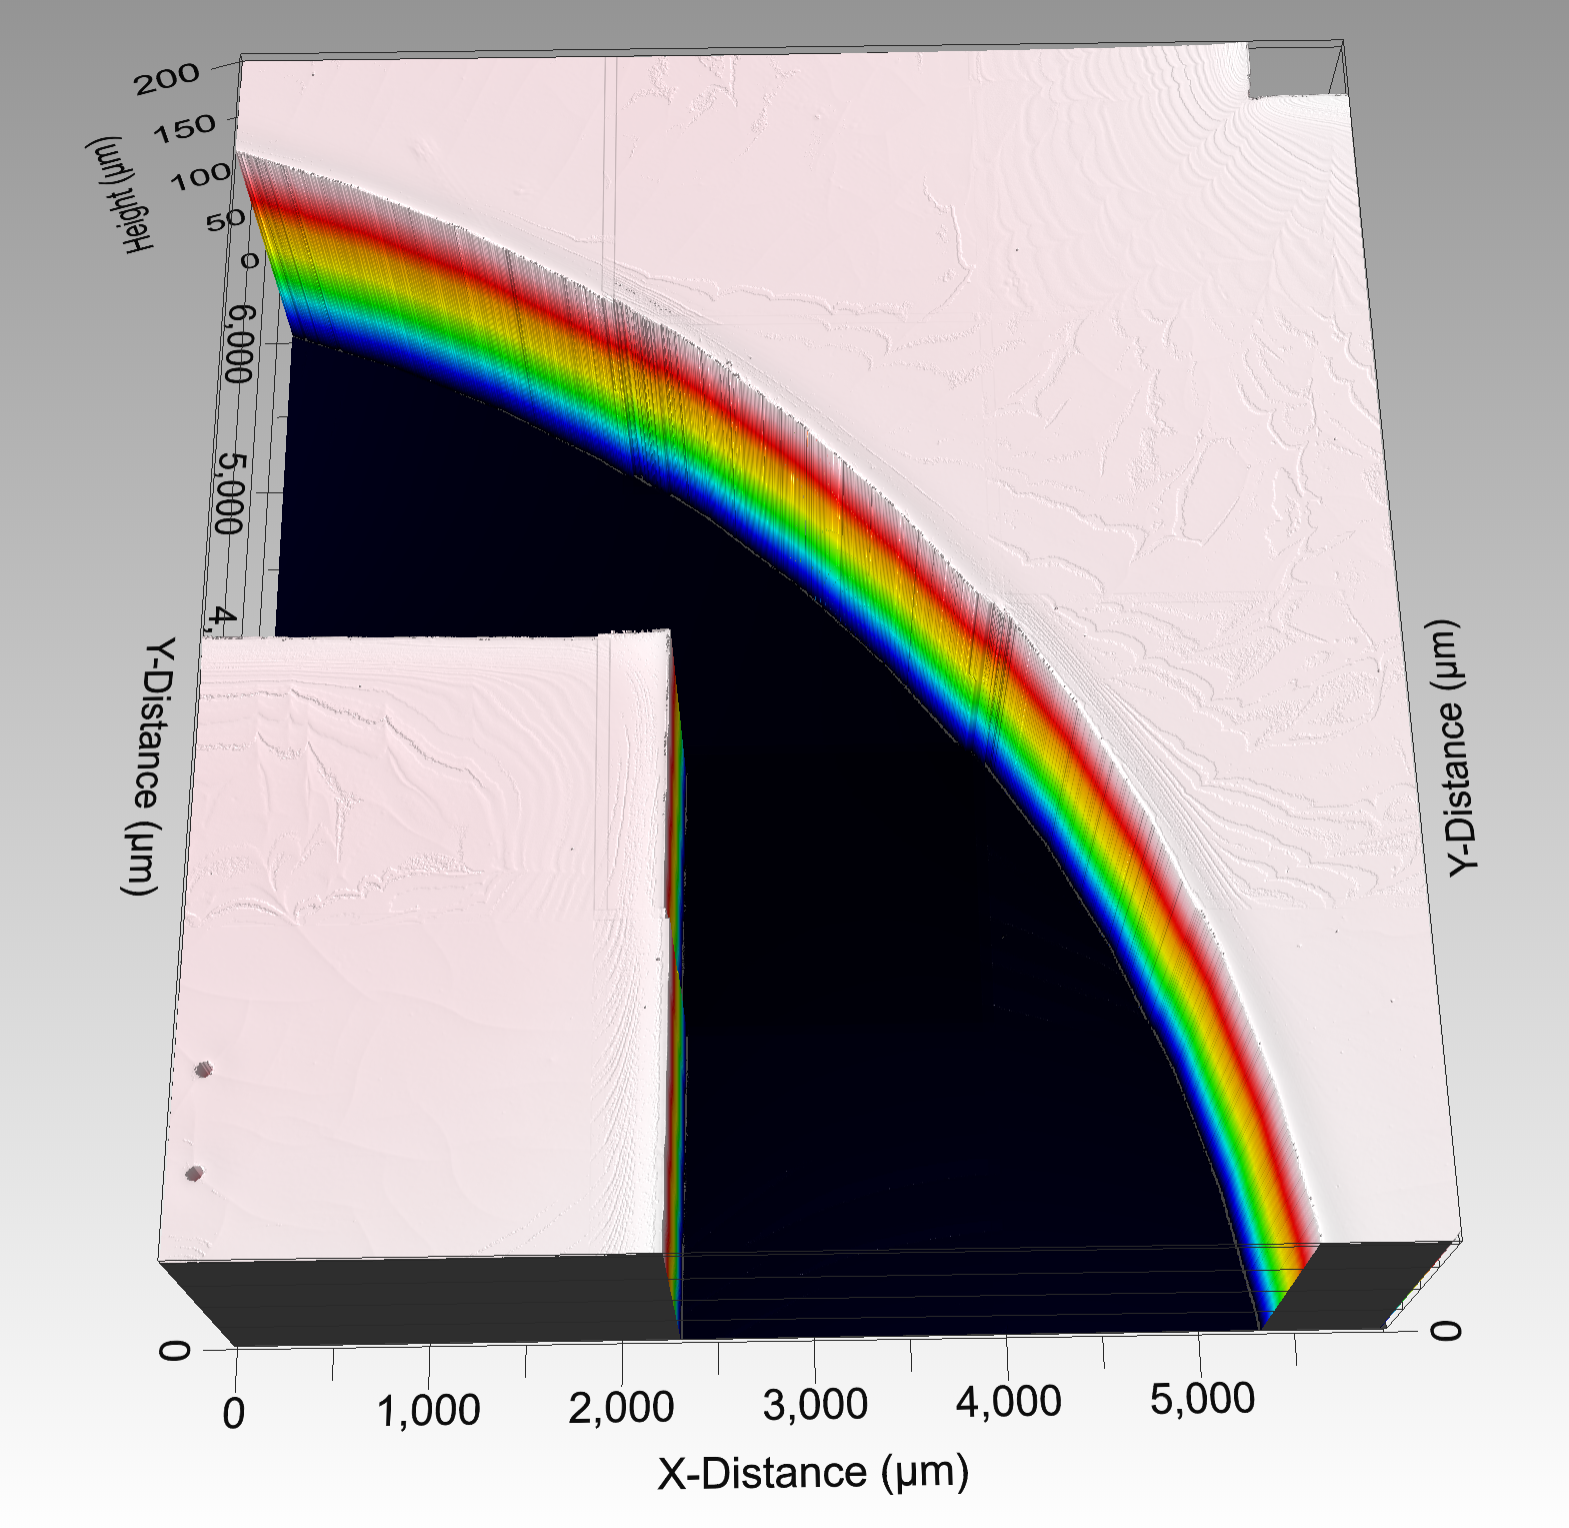
The completed stitched image